Initialize Workspace - dbFlux (1/9)
published on
This is the first post of a series about dbFlux. In this series I want to introduce and show you the most important features of dbFlux.
I'll start with some theory, yes I know this can be boring, but this way the workflow of dbFlux will be a bit more clear to you.
dbFlux is a VSCode extension that will make your life as a database or APEX developer much easier. With dbFlux you compile your database files, or execute them via SQLPlus or SQLcl with the configured database connection. VSCode shows you errors or warnings if necessary. Furthermore you can edit with dbFlux directly the static application files for example CSS or JavaScript and upload them into the database. The whole thing of course minified.
dbFlux is open source. You can find the repository here: https://github.com/MaikMichel/dbFlux
The concept
Unlike conventional database IDEs such as SQLDeveloper, TOAD or PL/SQL-Developer, you write your code in files and push them into the database. This has the advantage that you as a developer know exactly which files have to be deployed later on another stage. In addition, you can rely on version control in the file system and therefore check your changes into Git accordingly.
In order for the whole thing to work smoothly and to avoid any uncontrolled growth in the file system, dbFlux relies on a very specific directory structure. We call this smartFS. smartFS holds in the main directory mainly the folders where you export APEX application, manage schema objects, export REST modules and edit the static files.
dbFLux knows here 3 different project types, which differ in the number of the used schemas. The SingleSchema knows only one schema, the MultiSchema knows exactly three schemas, which are derived from the classic 3-tier architecture, and the FlexSchema, which can contain n-schemas. In FlexSchema mode, the schemas and workspaces are also stored in the various directories, which increases the hierarchy of the tree a little. In SingleSchema and MultiSchema mode the used workspace is stored in the configuration files.
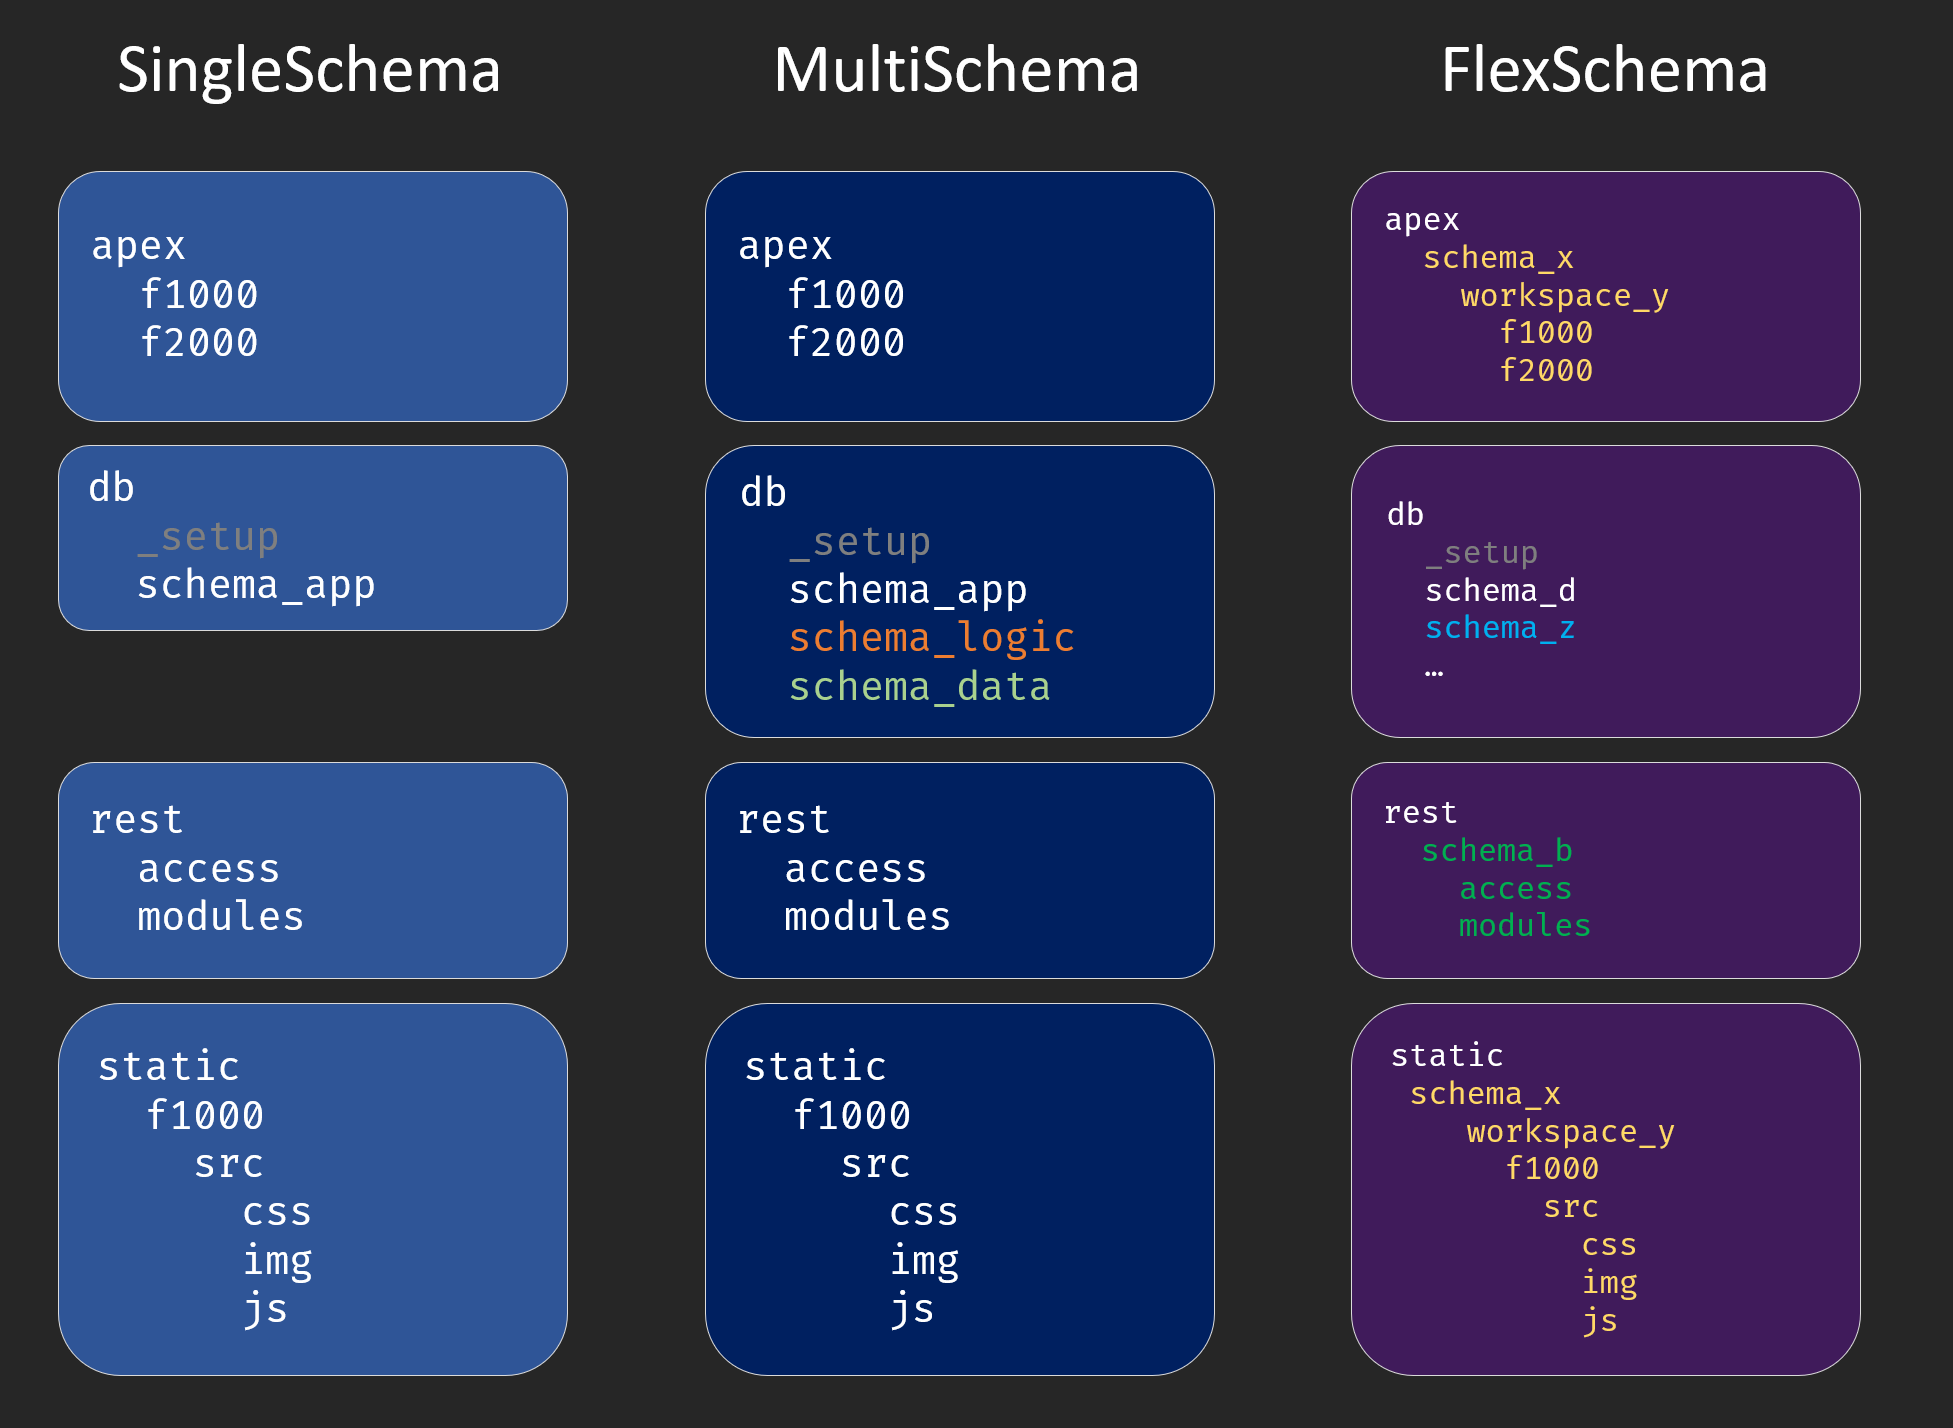
In addition to the used database schemas the db folder contains the subfolder `_setup`. Here the scripts are stored, which are executed with the use of a privileged account (sys, admin, ...) to create the respective schema, workspaces and used features.
How to start
The prerequisite for dbFlux is the presence of SQLcl and optionally, but I can only recommend, of SQLPlus. Additionally you need bash. In MacOS or Linux this is usually on board and in Windows you have to deal with git-bash. Additionally I recommend Git.
In VSCode you can find dbFlux via the extension list and install it easily.
To start now, you simply open an empty directory. Either in the explorer over the context menu or you do the whole thing over your shell. For example bash: mkdir todo && code todo
Now you have to initialize this directory or workspace with dbFlux. Ctrl+Shif+P: dbFlux: Initialize Project structure

Now you only have to answer a few questions, such as what your project is called, what project type you want to use (single, multi, flex), the data about your database connection, and so on.
dbFlux has now created the directory structure and created a few scripts that you can now modify.
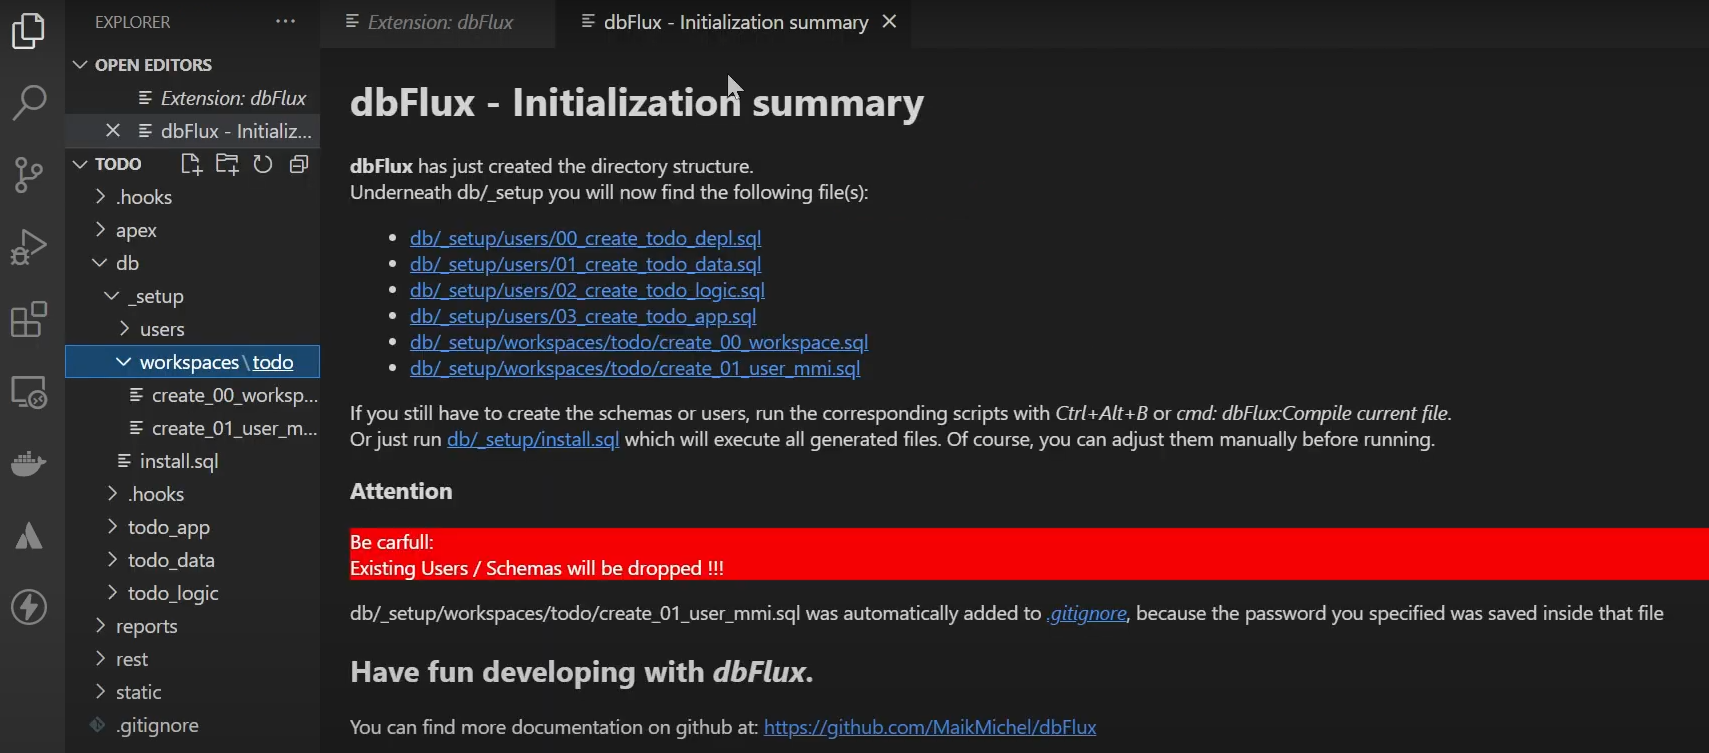
Attention: The schema scripts are designed in such a way that these schemas are deleted before!
Then you can open the script install.sql in the _setup directory and execute it with the command: Ctrl+Shift+P: dbFlux: Compile current File or simply with the keyboard shortcut Ctrl+Alt+B.
Basically: Scripts are executed with the user or proxy-user in whose directory the corresponding file is located. For the _setup folder this is the configured AdminUser (sys, admin, ...). For the normal database schemas in single-mode this is always the user with the corresponding directory name and in the other modes (Multi or Flex) there is a DeploymentUser, which has the right to connect as a proxy user for the respective users corresponding to the directory name.
When the script install.sql has run, the respective database users and schemas have been created. Furthermore an APEX workspace was created and a user with which you can log in to the workspace.
In the next post I will show you how you can easily create database objects with dbFLux.